Connecting n8n and HubSpot: Setting up a webhook trigger through an app and adding credentials for HTTP requests using an oAuth app
From a HubSpot portal I need to do some custom automation. As the portal lacks access to Custom Coded Actions I’ve opted to instead perform the automations in n8n.
I need it to trigger from happenings in HubSpot, preferably via a webhook to make the automation flow start operating in n8n, but the easy way to trigger these from workflow actions are also locked behind Operations Hub Pro. Secondary to this need is also a want to do calls into the portal to work with custom object data.
Here, I’ll outline how I set up a HubSpot app with webhook function to trigger a n8n workflow. Using the same credentials, we’ll then have an access point to HubSpot to do further API calls to GET/POST/PUT/PATCH/DELETE data on custom (and standard) objects.
In short, the steps are:
- Create a new app with a feature for webhooks and add the necessary scopes
- In the n8n flow, grab the webhook trigger URL
- In the app settings, configure oAuth installation for n8n, add the webhook trigger URL and install to portal
- In n8n, create credentials and use the installation settings from the app
- In any n8n node using API call to HubSpot, set the credentials to the same as set up above
- Run flow!
Creating the app
As I was testing the setup, the n8n documentation outlined the old way of creating private apps in HubSpot (a way to get API access to a portal) when you could do it by clicking through the UI. This method is now retired, and to access webhooks in the replacement app we’ll build using the HubSpot CLI and a terminal.
There are two different kind of apps you can create: private or oAuth.
The installation method differs slightly between them, where oAuth apps can be set up and installed across multiple portals (this is the type where you download an app from the HubSpot marketplace), while the private app is usually a single-purpose build for a specific portal. I opted to set it up oAuth style as it more closely resembled the instructions I could find for setting up the credentials later used in the n8n settings, and that I needed to run the same app in two portals (testing and live portal).
In other words, it is entirely possible that the private app method works just as well, but I’ll only outline the oAuth one as this is what I’ve tested.
Sidenote: webhook trigger or the HubSpot trigger?
The n8n flow is built on using the webhook trigger type, and not using the existing HubSpot trigger type. For this particular flow I’ll be interacting with custom objects which aren’t covered by the HubSpot action nodes (they only handle a few standard objects) so I’ll be needing to use HTTP requests (send API calls to the HubSpot portal calling custom objects) and set up credentials to gain access. The n8n <> HubSpot connector handles only the standard objects for the built-in HubSpot action nodes.
By using the app method I can thereby set up the same access route to ping the workflow of changes to trigger the automation and give credentials to the flow to send requests to the portal.
Steps of creating the oAuth app and adding the credentials to n8n
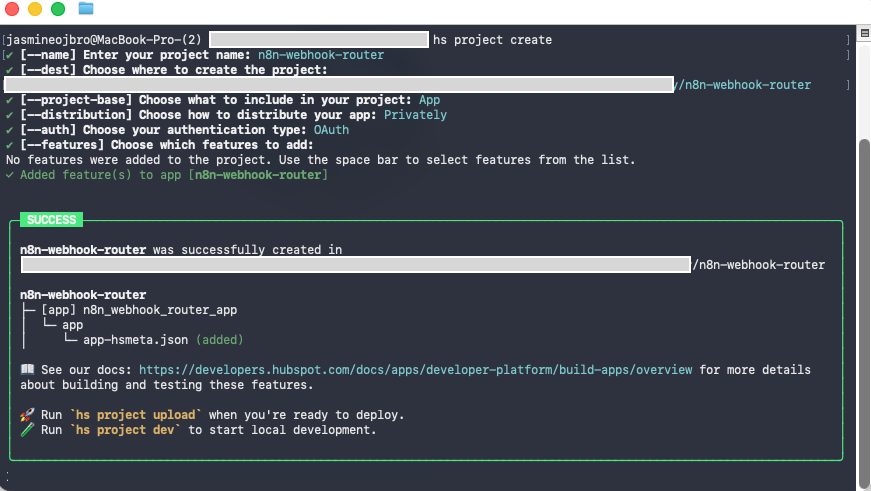
- Open a terminal and launch the HubSpot CLI
- Run
hs project create - Name: n8n-webhook-router (or similar)
- Include in project: App
- Authentication type: oAuth
- Features to add: Webhooks
- Open file
app-hsmeta.jsonand add the list of scopes seen further below (needs to match n8n documentation) - In the same file, change the “redirectUrls” to:
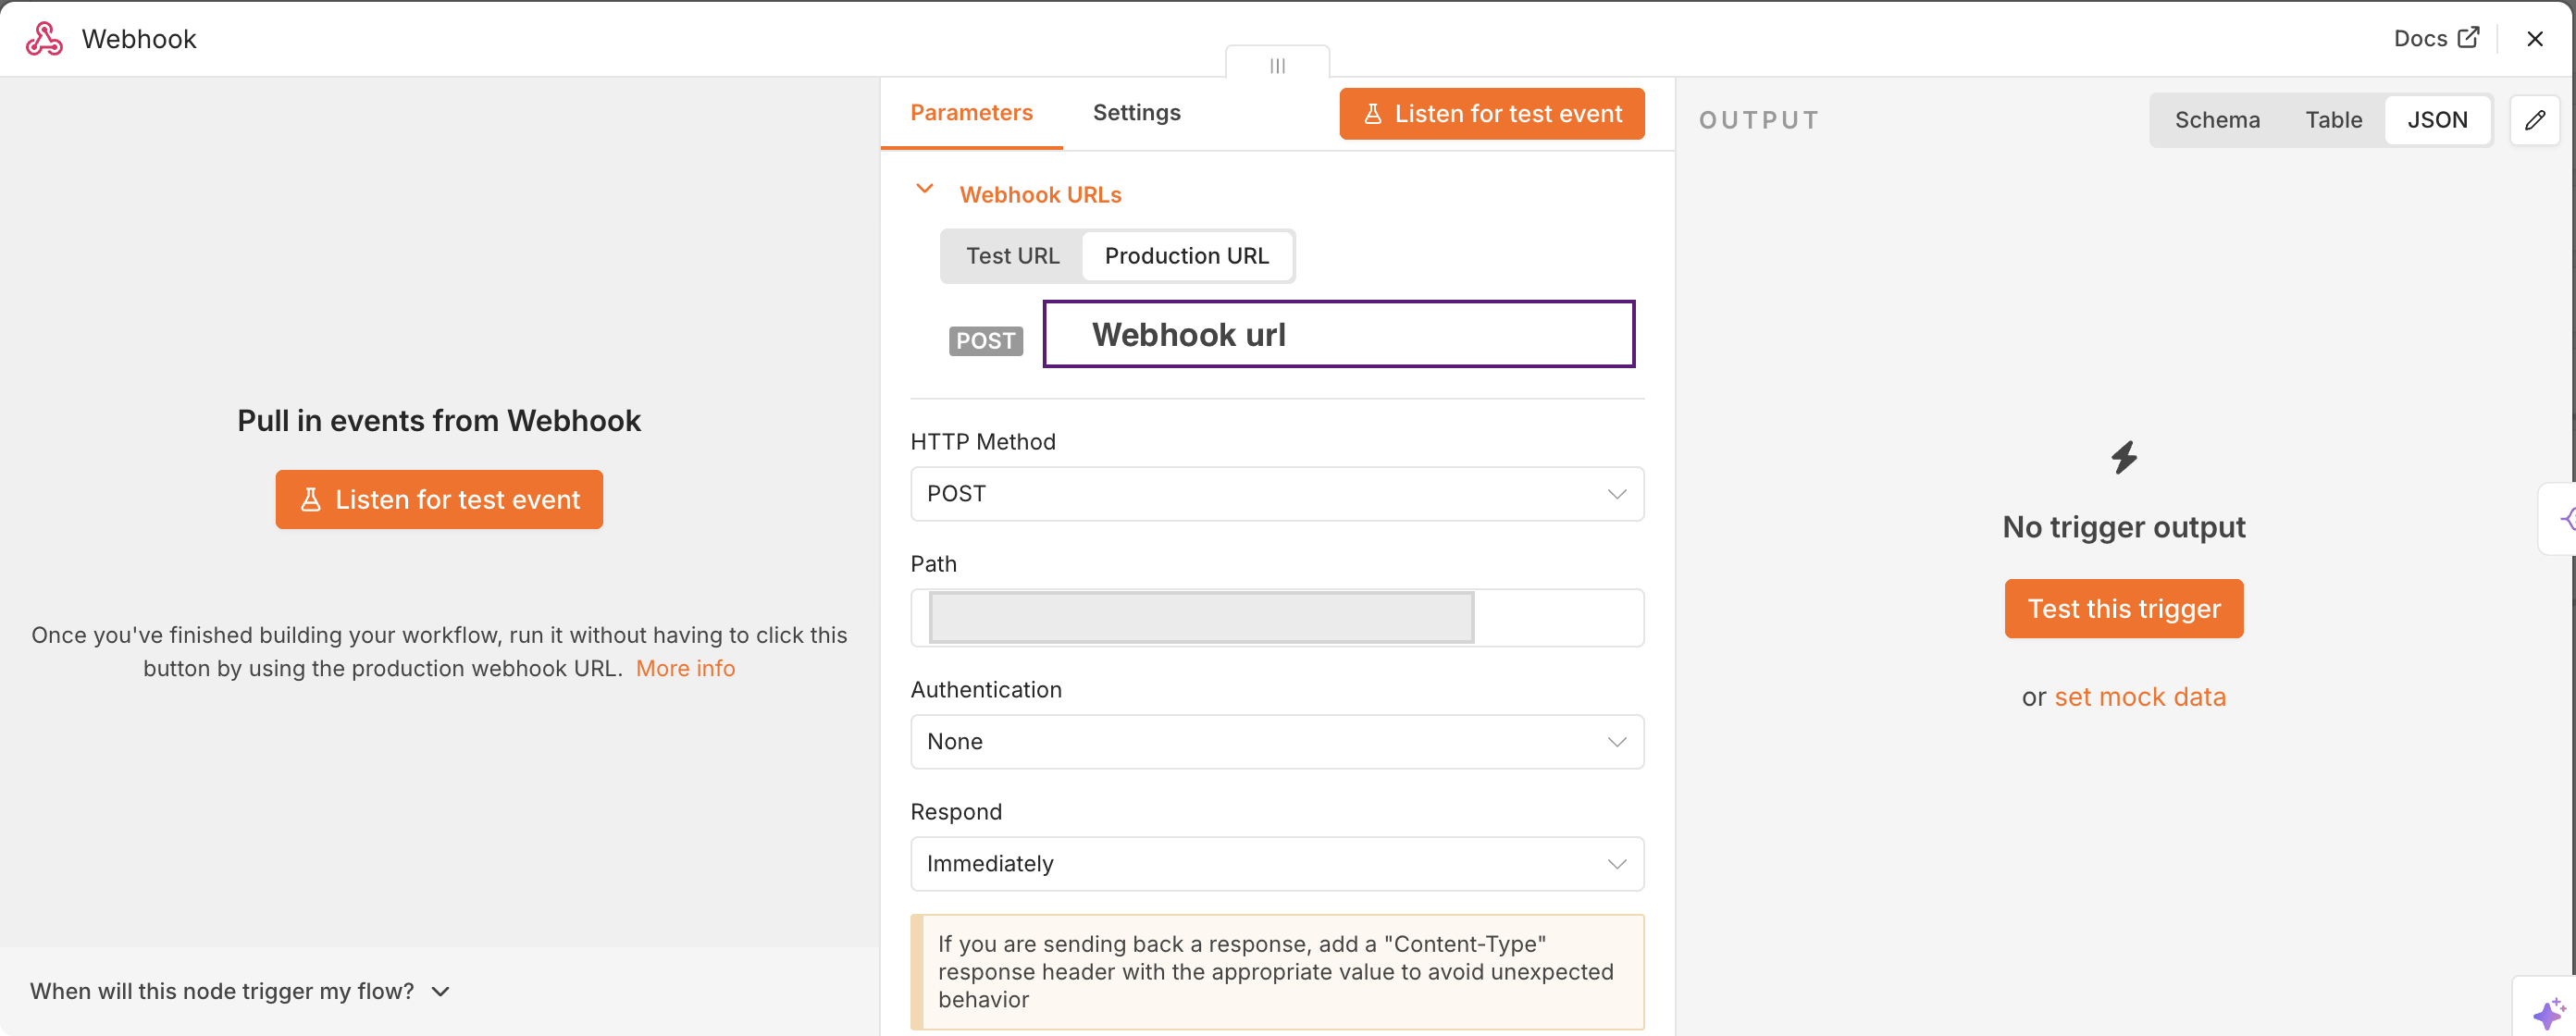
https://oauth.n8n.cloud/oauth2/callbackNotice!: This url may be different depending on your setup of n8n - double check before adding. - Create a n8n workflow with the trigger type set to webhook and open the trigger node. In the middle panel settings under Webhook URLs copy the Test or Production URL.
- Back in the files for the app, open the file
webhooks-hsmeta.jsonand change the targetUrl to the webhook trigger URL copied from n8n. - In the same file, clean up and set the triggering changes under subscriptions for what will trigger the webhook. See further below for example. There can be multiple triggers, but no conditional filtering (eg. if set to trigger on all changes to deal stage changes you cannot filter out to only trigger for specfic deal stages).
- Save all files and upload to your main portal in the terminal by running
hs project upload - Go to your portal under Development > Projects and verify that the app has been added
- In n8n go to Credentials > Create credential and pick OAuth2 API
- Grant Type: Authorization Code
- Authorization URL:
https://app.hubspot.com/oauth/authorize - Access Token URL:
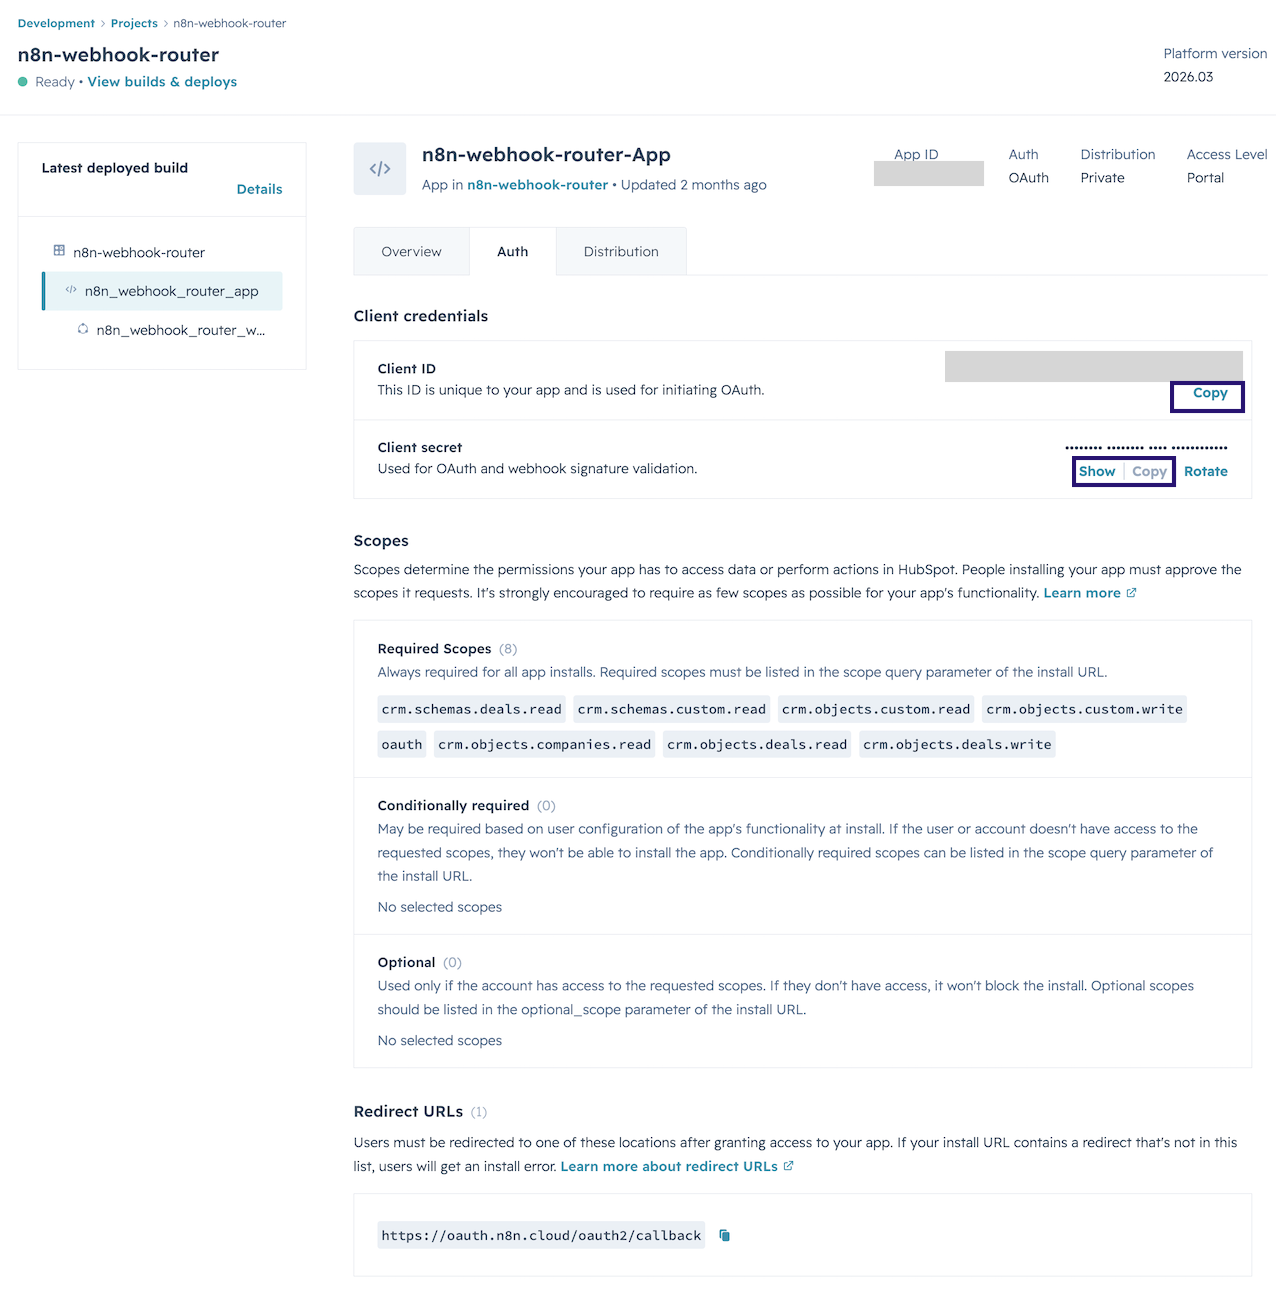
https://api.hubapi.com/oauth/v1/token - Client ID & Client Secret: Copy values from your HubSpot portal app settings. Step 13 > App file > tab Auth
- Scope: Add a text string that matches the scope of what you have in the
app-hsmeta.jsonapp-hsmeta.jsonwith a blank space between each. Example further below. - Authentication: Body
- Click: Connect my account > Pick the portal where the app is installed and complete steps
- The app should now be connected, and the credentials work
Using the Credentials in a HTTP request
To now use the credentials to access the portal with the app installed, we’ll use HTTP request type nodes. These allow us to do different kind of API calls to get, create or change data within the portal
- Add a HTTP Request node
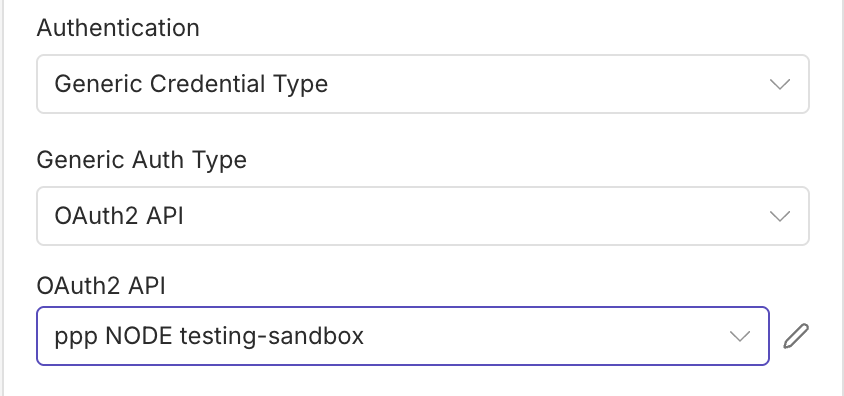
- Under the settings portion under Authentication pick: Generic Credential type and then oAuth2 API
- Choose the credentials we set up earlier
- Complete rest of node settings, and done!
app-hsmeta.json file example
This file contains the settings for the app itself and what scopes n8n can use if it tries accessing the portal where it is installed.
Changes from the base file include:
- Updated description
- Change to the URL under
redirectUrls - Added a list of
requiredScopes - Cleanup of
supportarea (even if only for internal use, it’s good practice to add your details there)
{
  "uid": "n8n_webhook_router_app",
  "type": "app",
  "config": {
    "description": "App to connect HubSpot to trigger N8N workflows",
    "name": "n8n-webhook-router-App",
    "distribution": "private",
    "auth": {
      "type": "oauth",
      "redirectUrls": [
        "https://oauth.n8n.cloud/oauth2/callback"
      ],
      "requiredScopes": [
        "oauth",
        "crm.objects.companies.read",
        "crm.objects.deals.read",
        "crm.objects.deals.write",
        "crm.schemas.deals.read",
        "crm.objects.custom.read",
        "crm.objects.custom.write",
        "crm.schemas.custom.read"
      ],
      "optionalScopes": [],
      "conditionallyRequiredScopes": []
    },
    "permittedUrls": {
      "fetch": [
        "https://api.hubapi.com"
      ],
      "iframe": [],
      "img": []
    },
    "support": {
      "supportEmail": "YOUR-EMAIL"
    }
  }
}
n8n scope
This needs to match the exact scopes from the app-hsmeta.json file. Based on my example, in my n8n credential settings they are set as:
oauth crm.objects.companies.read crm.objects.deals.read crm.objects.deals.write crm.schemas.deals.read crm.objects.custom.read crm.objects.custom.write crm.schemas.custom.read
Instead of new rows or comma signs, just have blank spaces between the different types. I’ve not tested putting them in a different order, and suspect they need to be listed in the same order as in the scopes file.
webhooks-hsmeta.json file example
This file contains the triggers that will send a ping to the webhook in n8n. It also specifies the URL it will send these pings to. I’ve not found a way to use the same app for multiple URLs, meaning you’ll need to set up one app per n8n workflow that has separate triggers and flows.
Learn more about how to configure the webhook changes at HubSpot’s Developer Documentation page for configuring a webhook subscription.
{
  "uid": "n8n_webhook_router_webhooks",
  "type": "webhooks",
  "config": {
    "settings": {
      "targetUrl": "YOUR-N8N-WEBHOOK-TRIGGER-URL-HERE",
      "maxConcurrentRequests": 10
    },
    "subscriptions": {
      "crmObjects": [
        {
          "subscriptionType": "object.propertyChange",
          "objectType": "deal",
          "propertyName": "dealstage",
          "active": true
        },
        {
          "subscriptionType": "object.propertyChange",
          "objectType": "deal",
          "propertyName": "closedate",
          "active": true
        },
        {
          "subscriptionType": "object.propertyChange",
          "objectType": "deal",
          "propertyName": "company_name",
          "active": true
        },
        {
          "subscriptionType": "object.propertyChange",
          "objectType": "deal",
          "propertyName": "pipeline",
          "active": true
        }
      ]
    }
  }
}
Final words
Unless you need the credentials portion of the app, I’m sure you can make it work on just setting up a private app with webhooks feature. This should still trigger and send data into the flow. I’ll post an update if I get a chance to explore setting up credentials using just the private app method (no oAuth involved).