Creating better custom coded action steps in HubSpot workflows
HubSpot has a neat feature if you’re on the right plan, where workflows can have a step run code in Node.js or Python. I frequently get to use this feature and audit and improve flows implemented by clients, and living in the LLM times of know a lot of these code snippets are obviously generated by LLM. I don’t see a core problem with that, but it does lack some sophistication that more savvy programmer tend to incorporate that can cause issues further down the line. Here are some insights and suggestions on how to improve the prompting process to get better custom code steps that scale and allow you to monitor errors.
The anatomy of CCA (Custom Code Action)
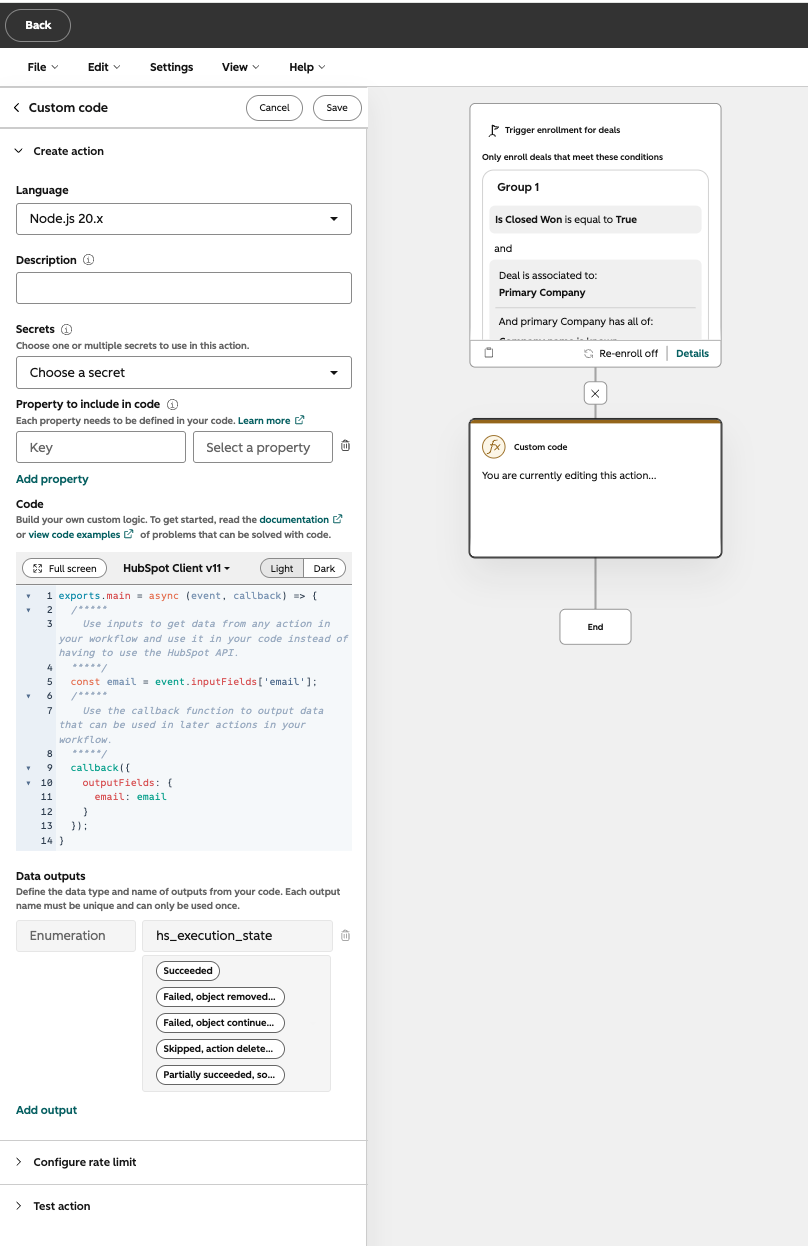
Inside a workflow, you pick the custome code action (CCA) step, and will need to know the following:
- You can pick the language the code is written in. Node.js is my preference, but Python is also available
- You’ll need to set up a secret which uses the access key to your API to make the code interact with the portal data (properties). This information is set up using HubSpot’s Service keys (see more details below, or skip if you’re familiar). If the code connects to an external platform, similar API keys will need to added here as service keys.
- There is a box for description that should explain what the code step does without needing you to read through the code
- The next area property to include in the code helps you map properties from the portal to the code
- Next, is the area to add the code itsel
- Finally, you’ll have an area for data outputs of what the code can tell the system once the code has run. It will include the execution state (if it successed, failed, had an error etc) out of the box. You’ll need to add outputs here
- At the very bottom of the modal is a test action area that allows you to run the code on a chosen record (it will execute the code) to verify that the code works before turning on the workflow
Setting up a service key and adding as a secret
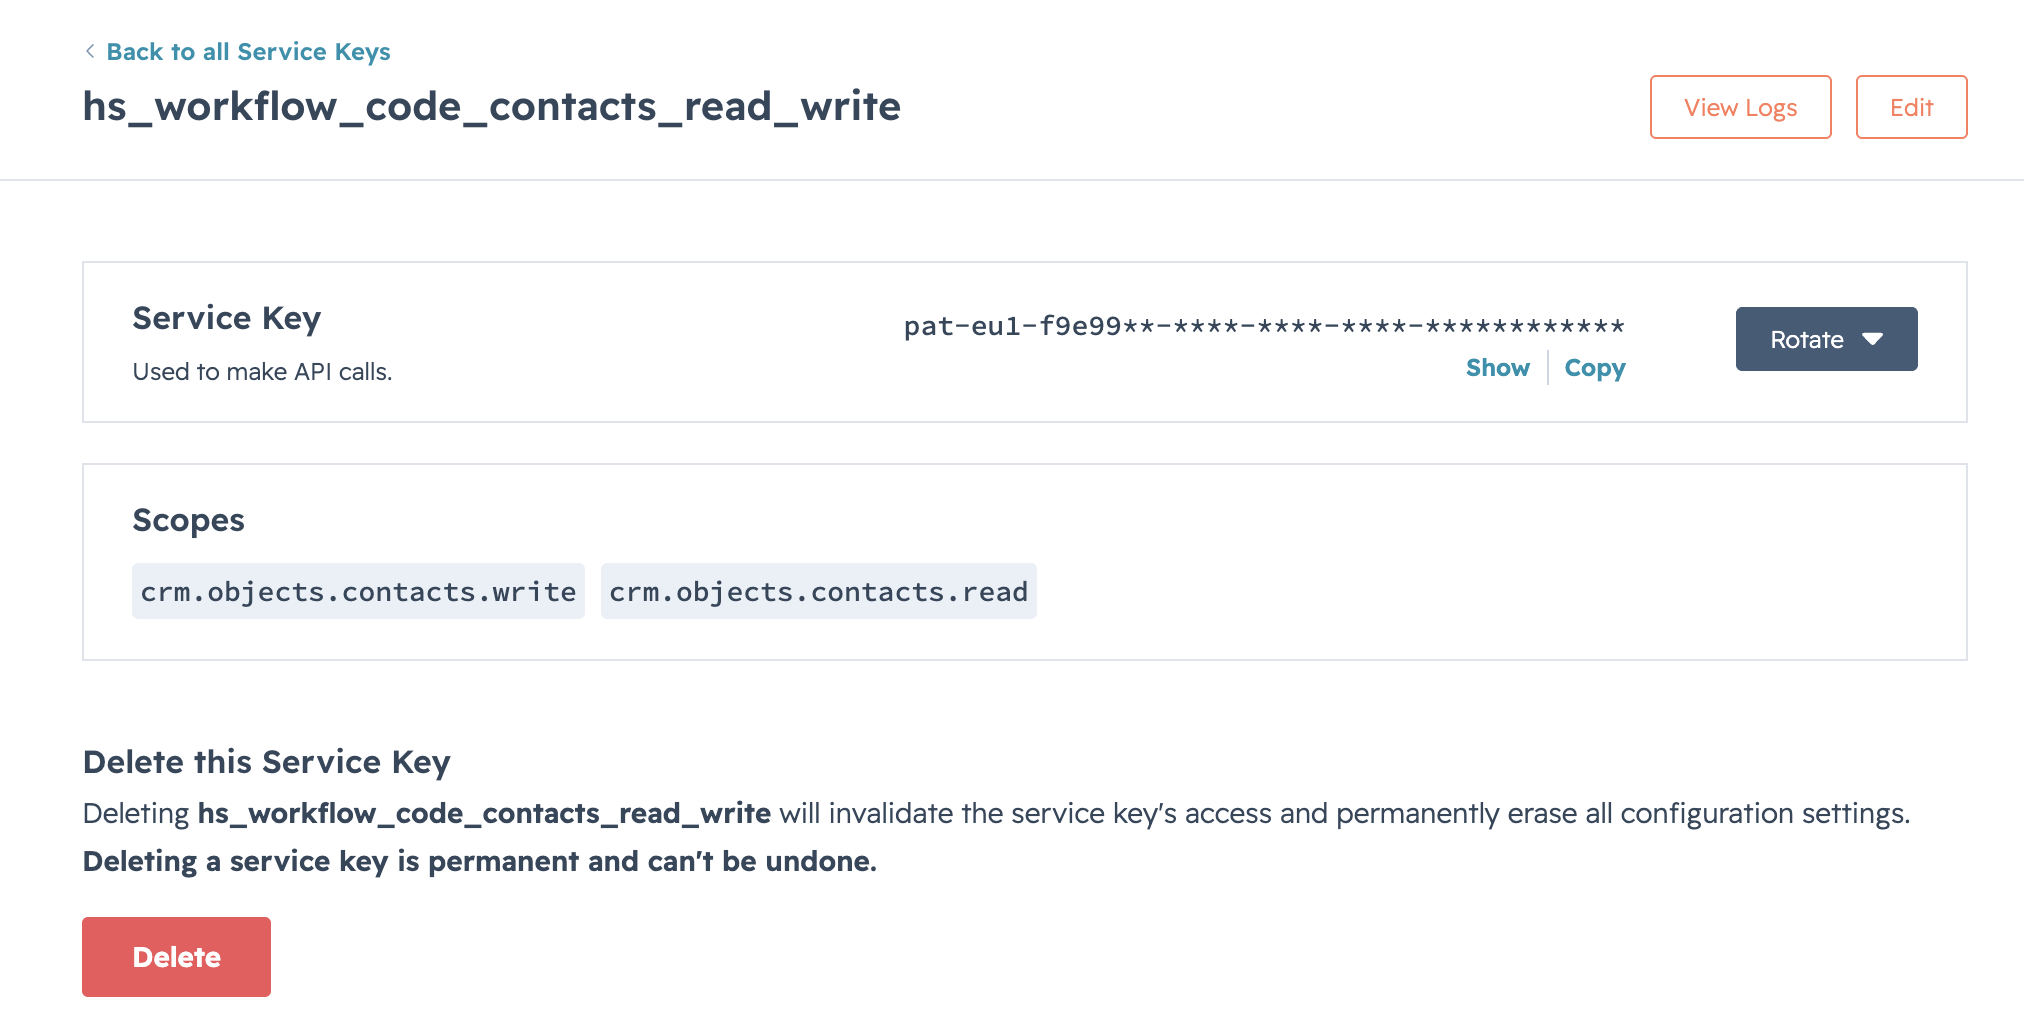
- Inside your portal, go to Development > Keys > Service Key
- Click “create service key”
- Name it something. I recommend a clear name that can be copy-pasted where it needs to be reused. Set the scopes (what part of the data this allows you to interact with)
- Set up your workflow and add a Custom code step
- In the code step, under Secrets > Choose secret > Add secret
- Add your API key name (copy paste from service key settings to make it clear which service key you are using)
- In the field secret value add the
pat-string (the full thing) from the Service Key overview (it will say na1 or eu1 depending on where your portal is hosted, North America or Europe) - Save. It can now be used in this and other code steps.
Preparing for the code: Understand the purpose
It’s key that you understand what you want the code to do. This needs to be explained to the LLM so it creates the flow accordingly, uses the correct data points and make the correct stuff happen.
At a minimum, you’ll want to be able to desribe:
- What the workflow does overall (trigger, goal, audience)
- What this specific code step needs to do within that workflow
- What inputs should be used (deal/contact/company/other properties)
- What outputs are expected (what gets written back, what downstream steps depend on)
Building the code: Verify property formatting
Something people tend to miss is that you need to match the input/output of properties with how they’re set up in the portal. If a property is a dropdown of options, you need to match the value exactly to the way the property has been set up. The same goes for date stamps, currencies or dealing percentages. For the code to behave, it needs to know the format of data.
This is true both for input and output.
Building the code: Outputs and error handling
The code step can be told to update something, it doesn’t need to spit back an output value that you then pass to an edit action to update something.
What you’d likely want to add to the mix however are outputs for error handling. In case the code failed, you’ll want two pieces of information to improve the code and flow, or to figure out what else is the matter. The console log and the error message.
Console log is a technical looking text that precisely outputs the error code, details, what record it entailed, what step failed etc. It will help you narrow down the issue rather than “something went wrong”.
The error message is more human readable and you can categorise different kind of errors to be more human readable. This can be updated as you see more examples in the console log of commong errors, for example when you get specific info in the consol log to indicate the 3rd party software you’re sending data to isn’t responding.
Using the error information
At a minimum, add these to the code and output. They will help mitigare silent failures (when there are no logs or information about why something went wrong). Both outputs will be viewable in the workflow’s action log for debugging.
An even better way to use them is include data after you trigger alerts.
After the code step, add a branch. You can have it branch on the value of HubSpot’s hs_execution_state (succes, failed, skipped, partially, etc) or set up your own method, for example a status code (200 for success, 500 for server error) or status (error, success, failed etc). Success means that flow ends (or passes to the next steps in the workflow) while any other status that may have been an error sets a task, logs a note or sends an internal email.
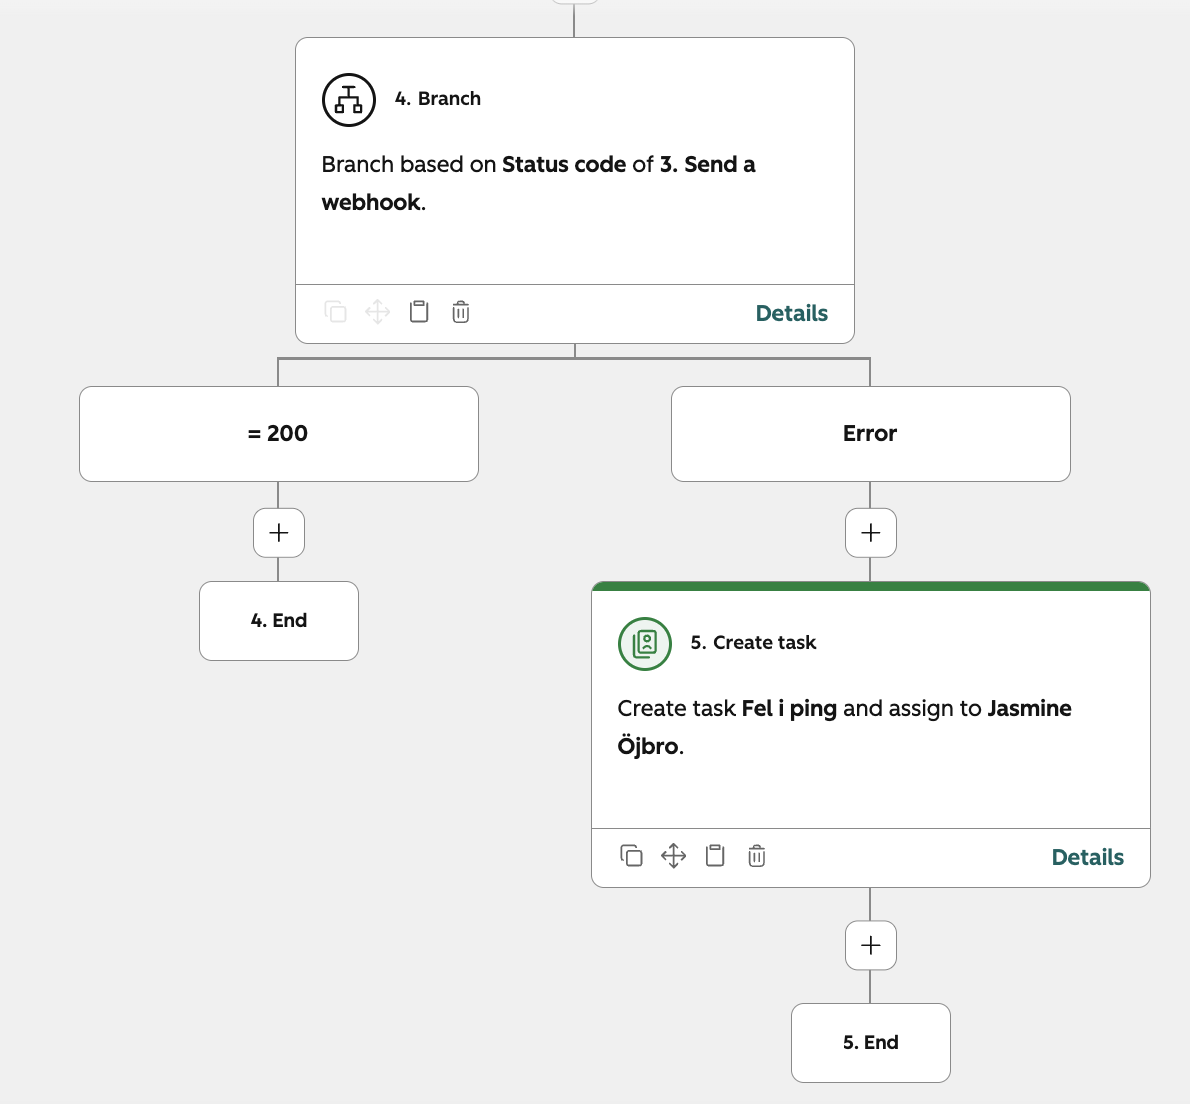
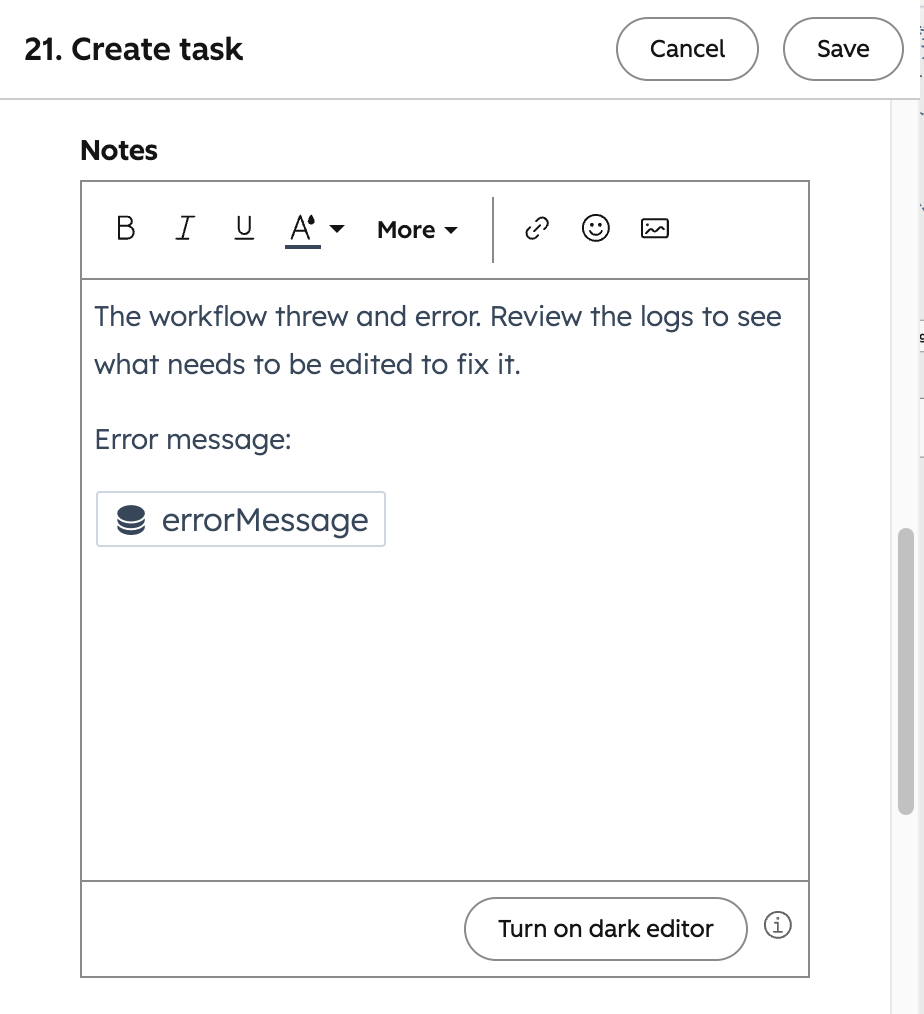
Here, pull in the value of the error message and tag the person responsible for the workflow maintenance.
I prefer setting up tasks and assigning them to myself. With the information available, you can now get a ping when something failed. Quickly spot the type of error and dig into the console logs for further information if necessary.
Improving the code and flow: Handling scaling
Every time the code runs it will access the API. Any request, to GET or POST information will count. There is a set limit to how many requests can be made within a rolling window of time, and a daily cap across the full portal. How many requests depend on the portal tier.
When a workflow triggers and enroll 10 records, these will fire the code step at the same time, and be more likely to cause a rate limit. Now up that to 100 records at the same time, and we have a scalability issue.
Two methods I’ve had success with are jittering in the code and delays in the workflow.
Jittering in the code
Jitter for enrolment means that you add in a random delay of a few seconds each time the code runs. 10 records hit the code at the same time, but execute the API calls at slight cadence.
The total runtime for the jitter delay + the API requests need to be within a timeout window, or it will cause an error.
Delays in the workflow
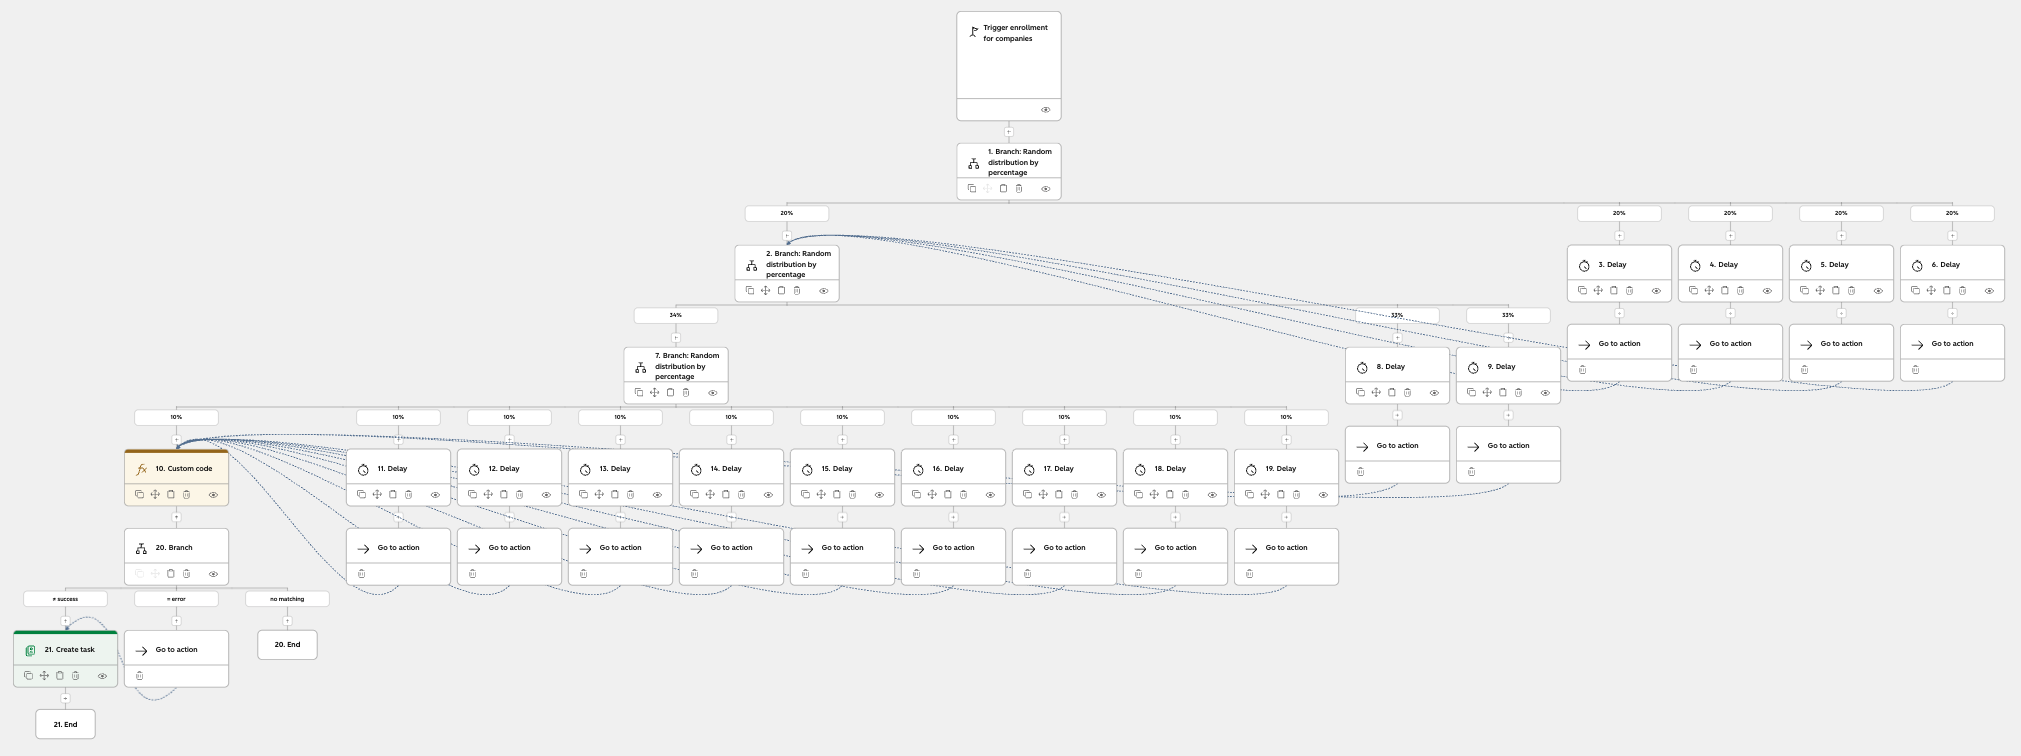
For batch enrolments (data cleanup or scheduled runs) there may be hundreds or thousands of records hitting the automation at once. Jitter isn’t enough to spread these out. A simple way is to use branches and delay. The total number depends on the expected number of records, and it’s good to plan for increases without needing to rebuilt the flow.
Branch after the initial enrollment, further dividing the records into more branches. Add delays between executions so they stagger.
LLM prompt for better Custom Code Action for HubSpot
This is a starting point to use with your LLM to get some of these points across, making sure it takes some of this information into account. Most of time time we use CCA because we’re trying to achieve something out of the ordinary that the usual edit action and the likes can’t handle. This also means that the strength of the code relies on the logic you
You are helping me write a **custom code action** for a HubSpot workflow using Node.js and the `@hubspot/api-client` SDK.

Before writing any code, follow the steps below in order. Do not skip ahead.

---

### 1. Understand the context

Ask me to describe:

- What the **workflow** does overall (trigger, goal, audience)
- What this **specific code step** needs to do within that workflow
- What **inputs** are available (deal/contact/company properties already in the workflow)
- What **outputs** are expected (what gets written back, what downstream steps depend on)

Do not proceed until you have a clear picture of both the workflow and the role of this code step within it.

---

### 2. Confirm the authentication secret

Ask me:

- Which **private app or service account** will be used for authentication?
- What is the **exact name of the secret** as stored in HubSpot's workflow environment variables? (This will be used as `process.env.YOUR_SECRET_NAME` in code — spelling and casing must be exact.)

Then, based on what the code step needs to do, tell me **which HubSpot API scopes are required** and confirm whether the private app I've described is likely to have them. Flag any gaps before proceeding.

---

### 3. Verify property formatting

Before writing any logic that reads or writes HubSpot properties, look up or confirm:

- The **internal name** of each property being read or written (not the display label)
- The **data type and expected format** (e.g. date properties expect a Unix millisecond timestamp as a string; checkbox/multi-select fields are semicolon-delimited strings)
- Any **enumeration values** for select fields — ask me to provide or confirm the exact internal option values, not display labels

If you are not certain about a formatting detail, say so explicitly and point me to the relevant HubSpot developer docs to verify before continuing.

---

### 4. Confirm the plan

Before writing any code, summarise back to me in plain language:

- What the code will do, step by step
- Which properties it will read and write
- What happens in each error case
- What the output fields will be named and what values they return

Ask me to confirm or correct this plan. Only proceed to write code once I have approved it.

---

### 5. Write the code

Follow these standards when writing the code:

#### Structure

- Use `exports.main = async (event, callback) => { ... }` as the entry point
- Wrap all logic in a top-level `try/catch` as a safety net
- Use a **separate, nested `try/catch`** around any HubSpot API call so API failures are isolated from general runtime errors

#### Input validation

- Validate all inputs before doing any work — check for missing, null, or malformed values
- Return early with a clear `errorMessage` if validation fails

#### Jitter for batch enrolments

If this code step may run across many records at once (e.g. bulk enrolments or list-triggered workflows), add a random delay before any API call: `await new Promise(resolve => setTimeout(resolve, Math.floor(Math.random() * 8000)));`

**Note:** Verify the workflow's action timeout limit and adjust the maximum delay (`8000ms`) accordingly before using in production.

#### Write confirmation

- After any API write, check the returned response to confirm the expected value was actually saved
- If the confirmed value does not match what was sent, treat it as an error

#### Error handling — two-layer principle

| Layer | What to include | Audience |
|---|---|---|
| `console.error(...)` | Full technical detail: error status code, error message, relevant record ID. Prefix with a tag e.g. `[step_name]` for easy filtering in logs | Developer debugging in workflow action logs |
| `errorMessage` output field | Plain, non-technical message only. Never include raw error objects, status codes, or internal field names | Non-technical users viewing workflow enrolment history |

#### Output fields

- Always return at minimum: `status` (`'success'` or `'error'`) and `errorMessage` (empty string on success)
- On success, set `errorMessage: ''` explicitly so no stale value persists

### 6. After the code

Tell me:

- What to add as **input properties** in the workflow action editor (exact property internal names)
- What to add as **output fields** and what downstream steps can use them for
- Any **workflow settings** to be aware of (e.g. re-enrolment behaviour, action timeouts)